Meta
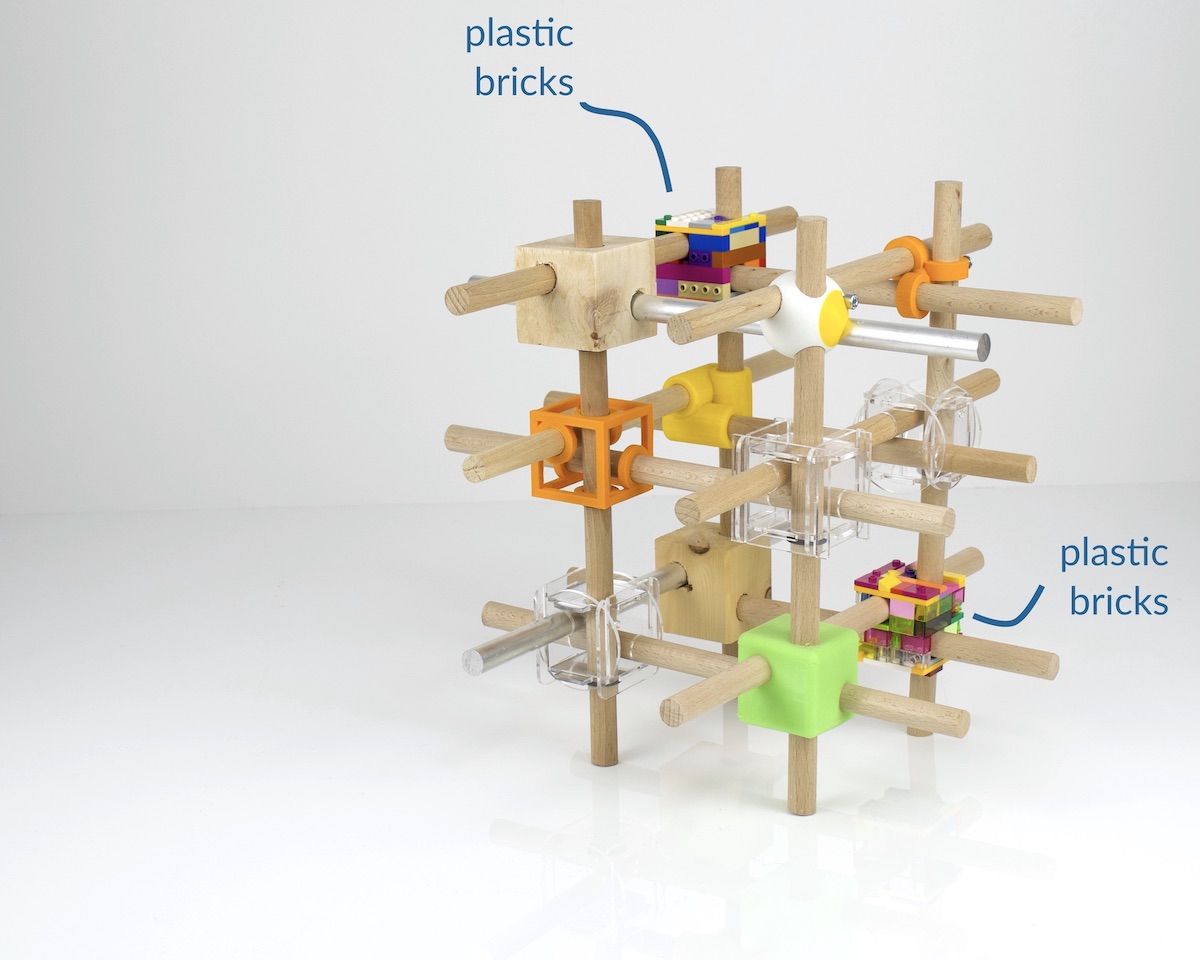
Mifactoris Open Shelve Nodes – plastic bricks version, LEGO® +
*
Plastic bricks
pics ↓
.
info ↓
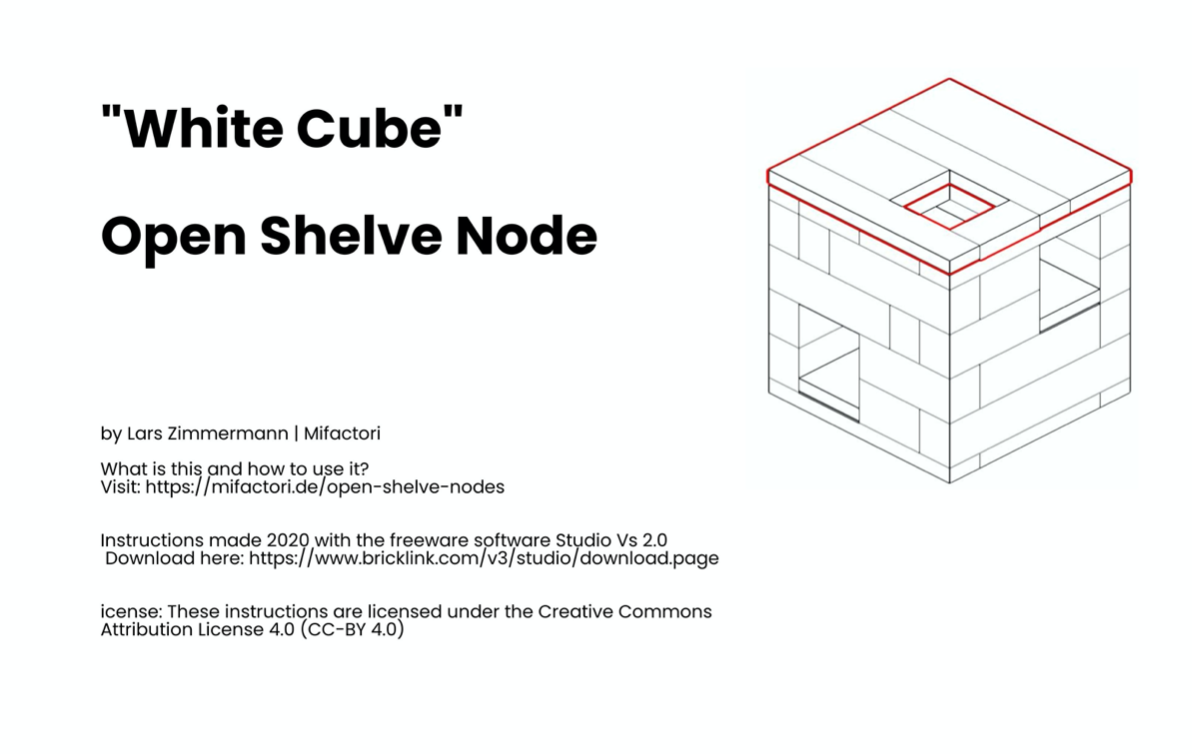
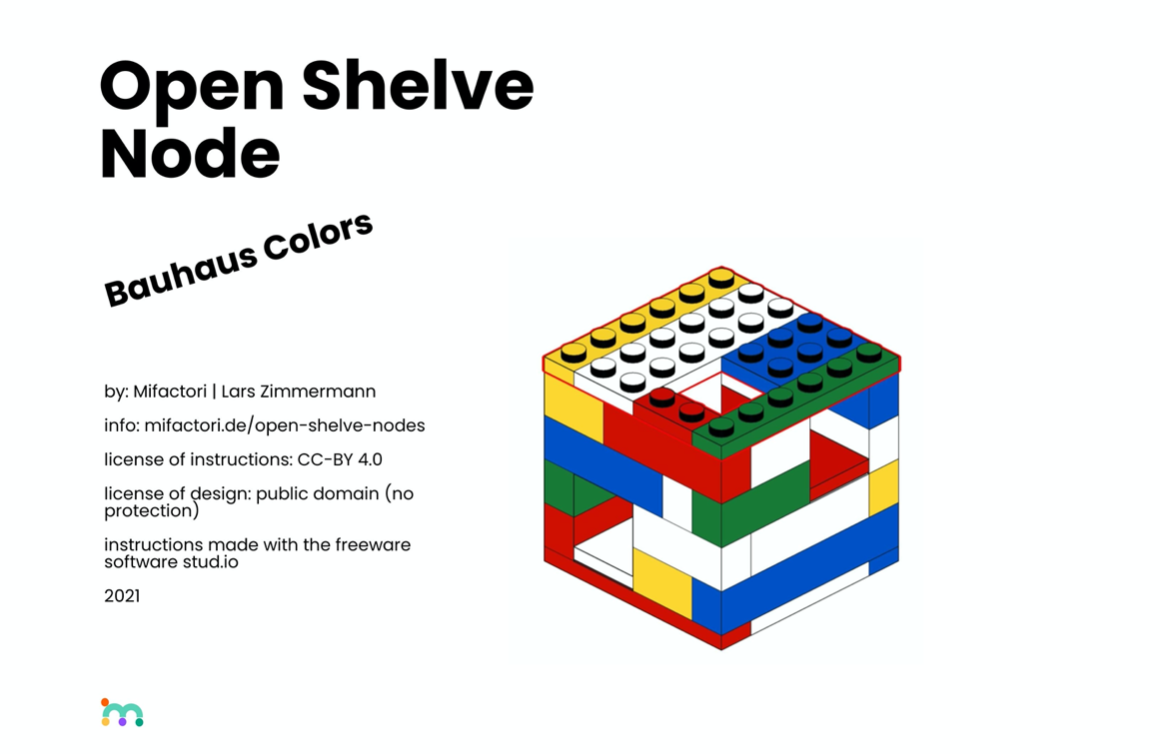
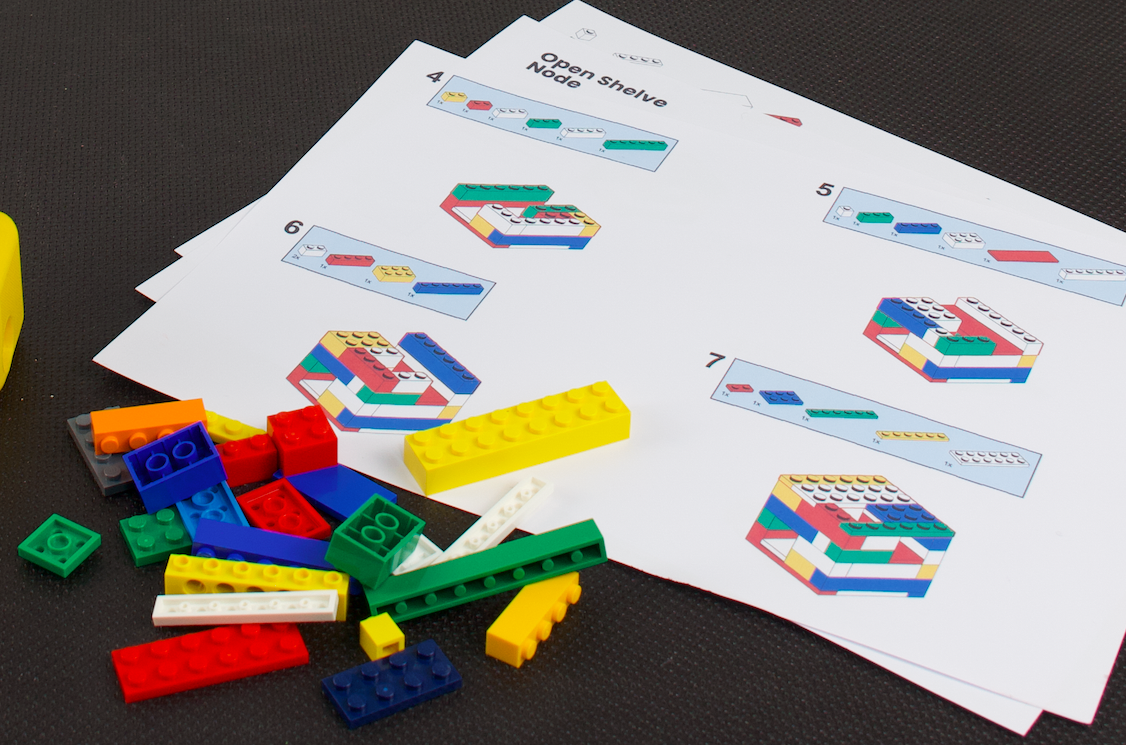
Download instructions
- The two instructions we made are of course not the only way to create these nodes. In fact there are countless ways as you can see in the video below. Once you understood what you need to do it is easy and fun to become creative and work with the bricks you have.
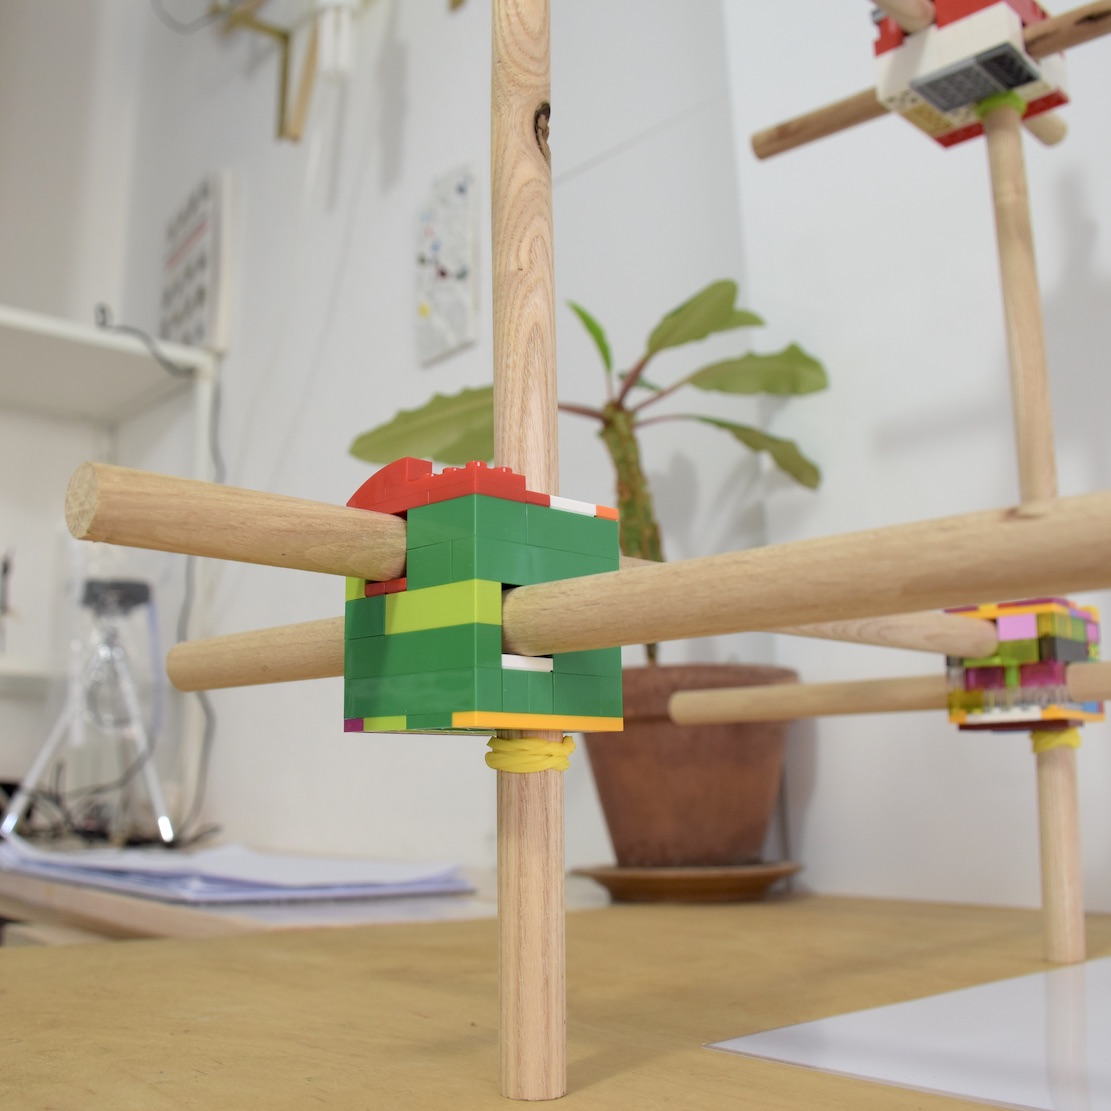
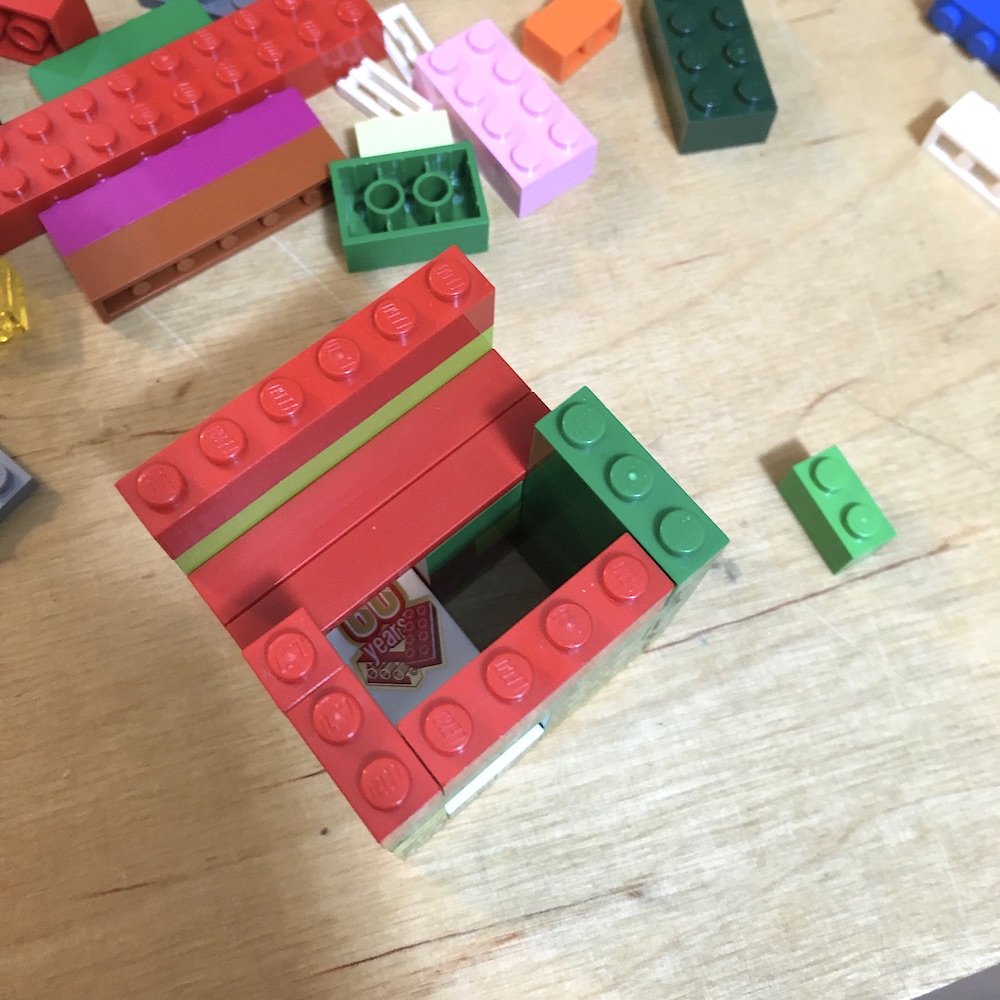
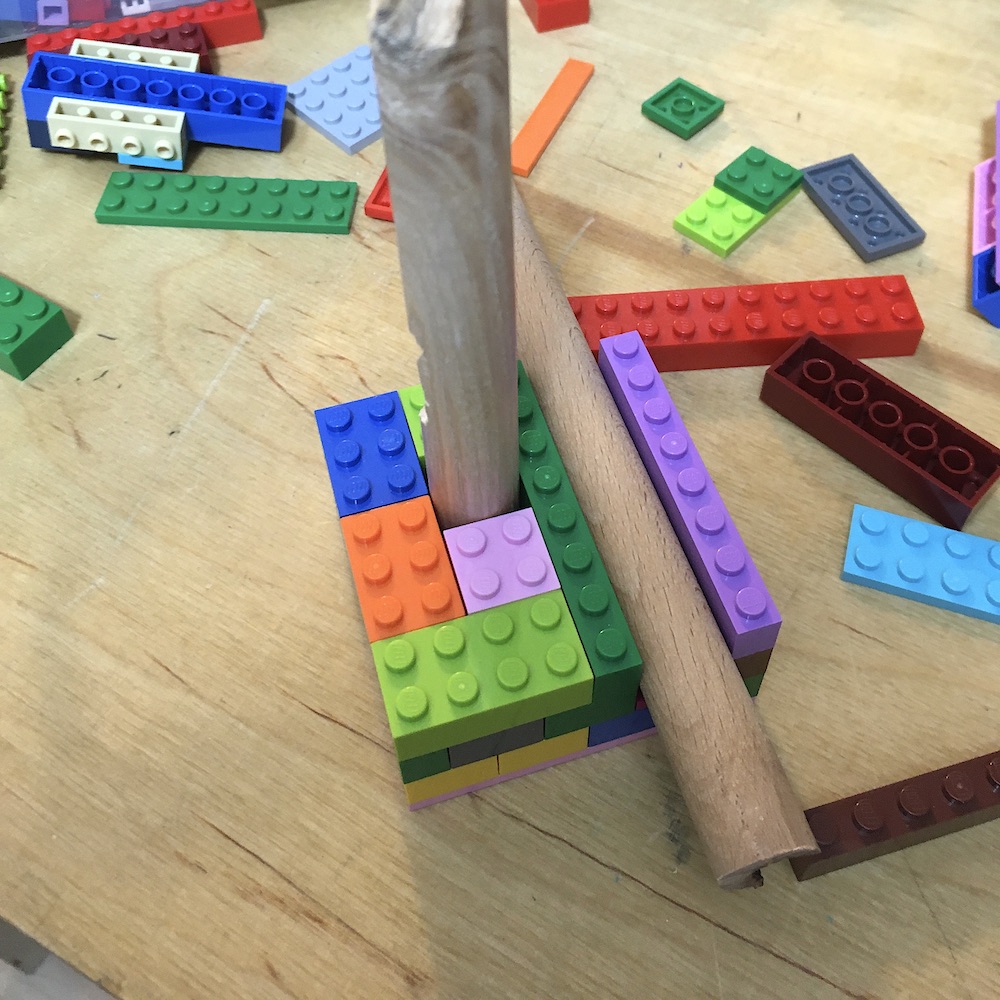
- The distance between the center of two studs is 8mm. Two studs make 16mm. And 16mm is an absolute standard diameter for round rods where Mifactori is located (Germany). To achieve the exact 16mm height have two rows of regular bricks and one tile at the bottom where the rod goes through (see last image above).
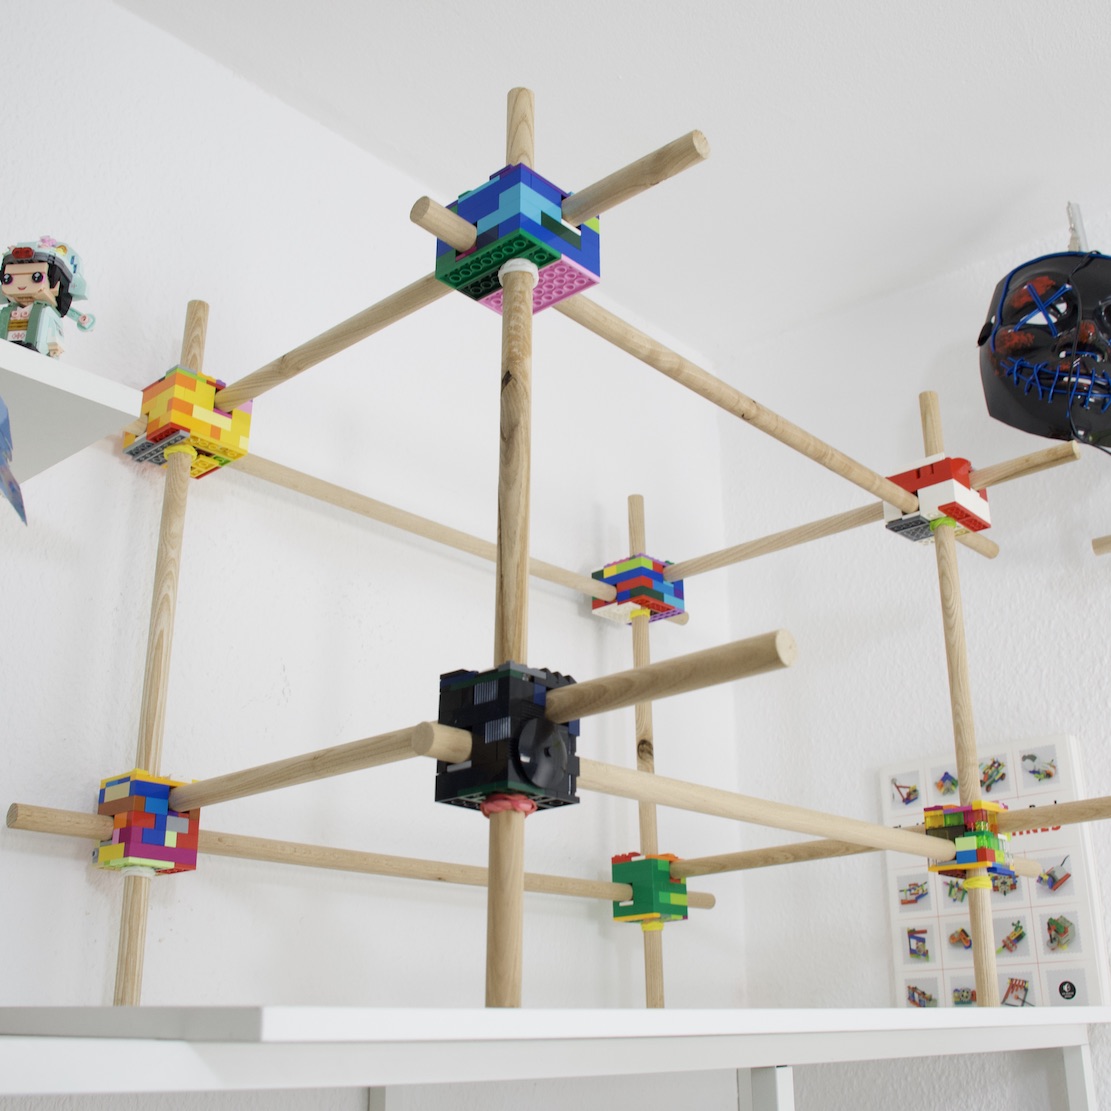
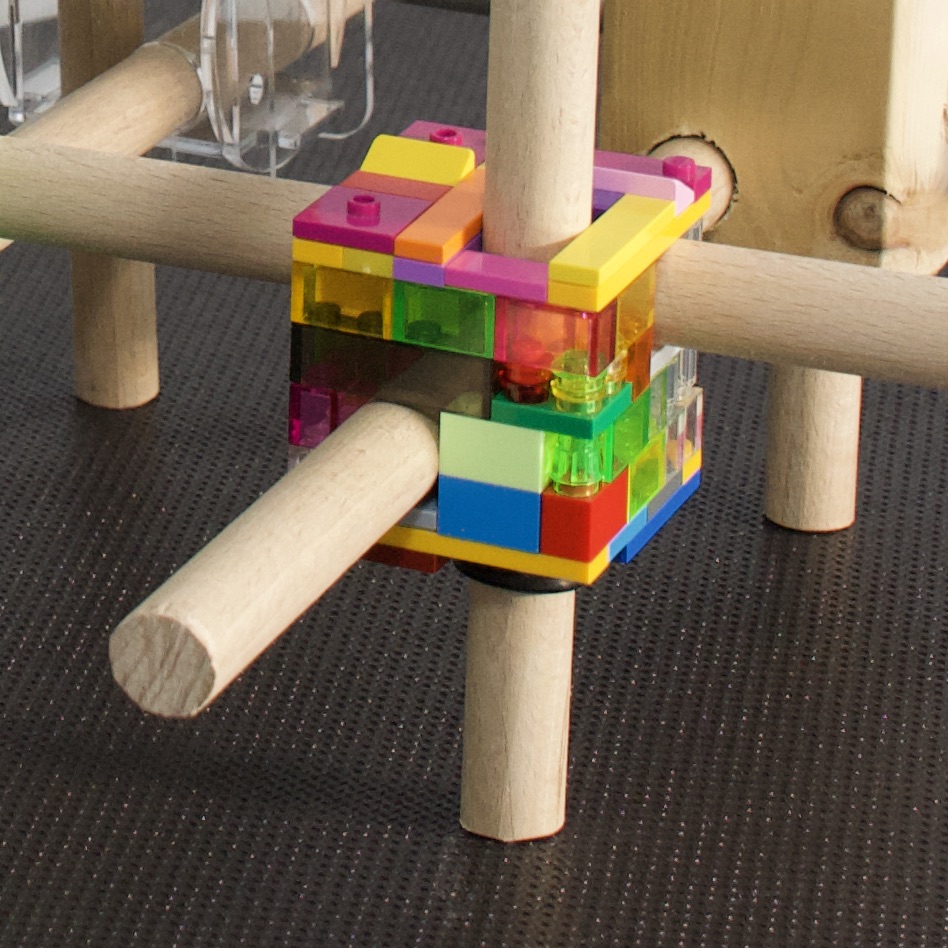
- Is this stable? Yes. Surprisingly (see video below). It depends a bit on how you put the plates on top. Chose a way that will apply pressure on top of the nodes. This presses the studs together. The more weight on the shelve – the more they are pressed together – the more stable everything becomes. The weak point becomes the stopper under the node.
- In case you still don’t know. There are plenty of manufacturers who produce these kinds of bricks. They are basically open. You can get them in very good quality from all kinds of manufacturers not just LEGO®.
- There are several resellers where you can buy LEGO® parts. The biggest platform for this is bricklink. Get the part numbers from the instructions above and order in the colours you like. The “White Cube” instructions version lets you access very quickly the necessary numbers (clean parts list).
*
We tested the plastic bricks nodes and made instructions for them during our gläserne Fabrik streaming #3. A video recording of this is below. See the nodes in action and under stress (→ stress test starts at 52:12).
.
*
More Open Shelve Nodes
*
#OSN #openshelvenodes #opencirculardesign