3erlin Grid Documentation (pls. add)
ALL IMAGES ON THIS PAGE ENLARGE IF YOU CLICK ON THEM | ALLE BILDER AUF DIESER SEITE LASSEN SICH DURCH EINEN KLICK AUF DIE BILDER VERGRÖSSERN
[o]
°
Introduction / Einführung
What is the 3erlin Grid? / Was ist das 3erlin Grid?
The 3erlin Grid (say ‘Berlin Grid’) is a decentralized open standard for objects & structures like furniture, vehicles, housing or machines. It follows a similar idea as the Open Structures Project. A modular decentralized collaboration system on the basis of a shared geometrical grid where everyone can design with everyone for everything. It brings Meccano to the real world and invites everyone to contribute parts.
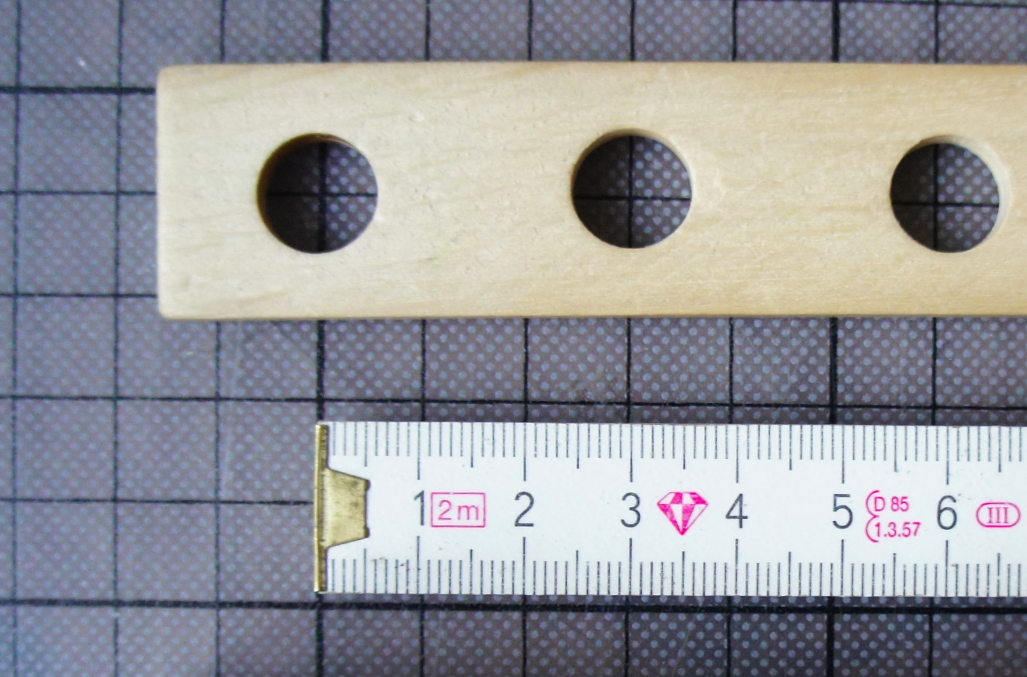
The measures of the 3erlin Grid are 3x3cm – there is always a distance of 3cm between holes for nuts and bolts. As a result all parts always fit together and be recombined in infinite ways – enabling constant circular reuse: What is part of a desk today can support a tractor next week and a porch after that.
There is a network effect in the parts. With 20 Lego bricks you can build a little bench. If you add 30 more you can do more, also with your initial 20 bricks. You can build a house or a car if there are wheels now – something you did not expect with the initial first 20 bricks! Every new part grows the possibilities of all parts around.
(More Info: Mifactori Blogpost: Why do we use the 3x3cm and not the Open Structures 4x4cm Grid?)
Das 3erlin Grid (sprich “Berlin-Grid”) ist ein dezentraler offener Standard für Objekte und Konstruktionen wie z.B. Möbel, Fahrzeuge, Behausungen oder Maschinen. Es folgt der gleichen Grund-Idee wie das Open Structures Projekt: Es ist ein modulares dezentrales Kollaboratoinssytem auf der Basis eines einheitlichen geometrischen Rasters. Das Raster erlaubt es, dass jeder für jeden und jeder mit jedem gestalten kann. Die Konstruktionswelt von Stabilbaukästen wird in die richtige Welt gebracht und jeder ist eingeladen, Teile und Ideen beizussteuern.
Die Maße des 3erlin Grid sind 3x3cm – d.h. der Abstand zwischen allen Löchern für Schrauben beträgt immer 3cm. Hält man sich daran, passen hinterher alle Teile mit allen zusammen und können beliebig neu kombiniert werden, auf unendlich verschiedene Weisen. Zirkuläre Wiederverwendung wird somit möglich. Was heute Teil eines Tisches ist, kann morgen in einem Traktor stecken und danach in einer Veranda. Müll kann so vermieden werden und ein kreativer Umgang mit der Umwelt erlaubt werden.
Es gibt einen potentiellen Netzwerk-Effekt in den Teilen! Je mehr Teile in die Welt kommen, je mehr wird möglich mit den Teilen, die schon da sind. Mit 20 Legosteinen kann man eine kleine Bank bauen. Fügt man 30 hinzu kann man schon ein Haus bauen mit den ersten 20.
Mehr Info dazu: Mifactori Blogpost: Why do we use the 3x3cm and not the Open Structures 4x4cm Grid?)
Examples of Use / Verwendungsbeispiele
In this documentations you might find some extra-tricks or uses.
In diesen Dokumentationen findet man vielleicht ein paar Extratricks oder Anwendungen.
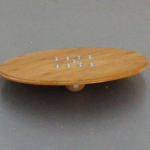
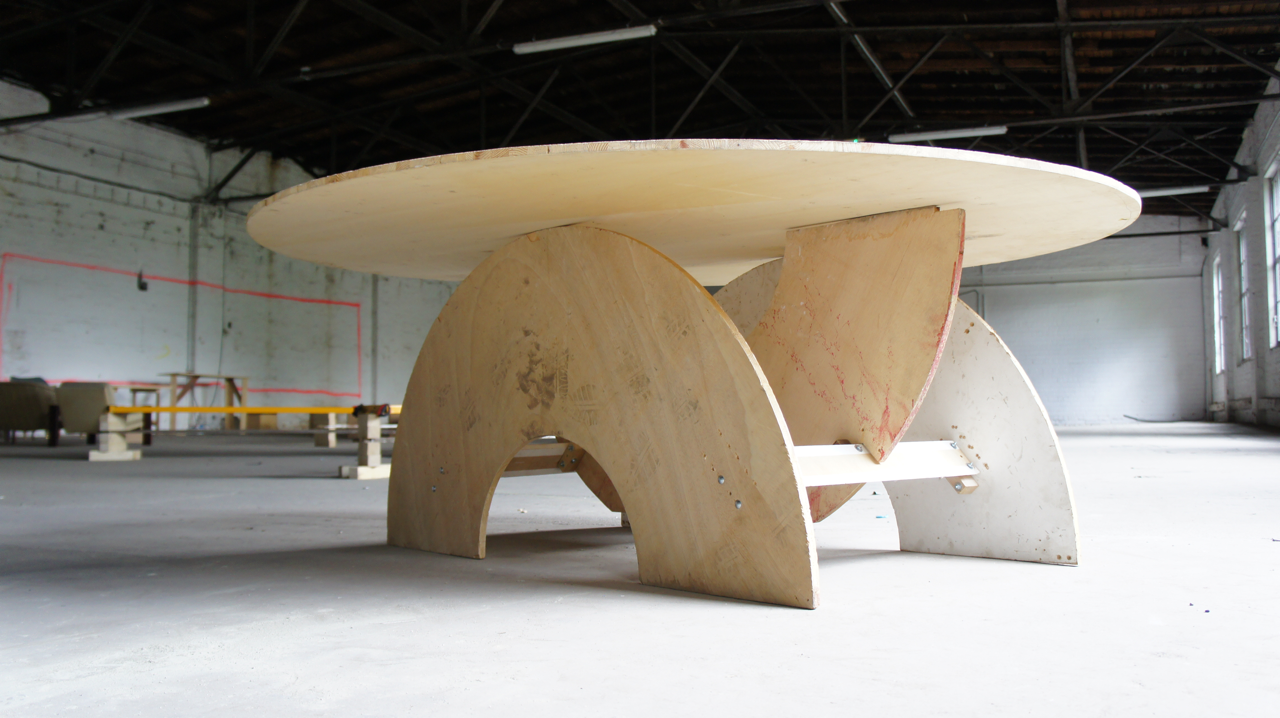

Sample of Mifactoris 3erlin Grid Parts Library
More 3erlin Grid soon/Mehr 3erlin Grid bald
Study the open structures website for products based on a unified grid / In der Zwischenzeit kann man die Open Structures Seite studieren für mehr Produkte basierend auf einem einheitlichen Grid.
Basic Instructions / Basisinstruktionen
Many basic instructions you can take away from the Open Structures Tutorial about their 4cm grid. Many absolute fundamental things are explained here very well.
Einige Basisinstruktionen kann man dem Open-Structures-Tutorial entnehmen, die mit einem 4cm Grid arbeiten und damit ganz ähnliche Probleme haben. Viele absolut grundlegende Dinge sind hier wunderbar erklärt.
3erlin Grid Parts To Buy / Teile Kaufen
For open source hardware the first question is almost always: Where can I buy the parts – because you can’t download the physical devices like software from everywhere. Here is a collection of sources where you can buy 3erlin Grid or 3erlin Grid fitting parts. More you can find by scrolling through this page. Do you know more? Let us know – in the comments or write us an email: mifactori@email.de.
Shopping List
- Heros Constructor – a toy for children, available online in many shops, everywhere in Europe at least,
- 1,5cm x 1,5cm Lochblech – see below in “Stencil / Schablone”
- Have them made for you! (Show the craftsman this tutorial)
- Spacer – see below in “Spacers / Abstandhalter”
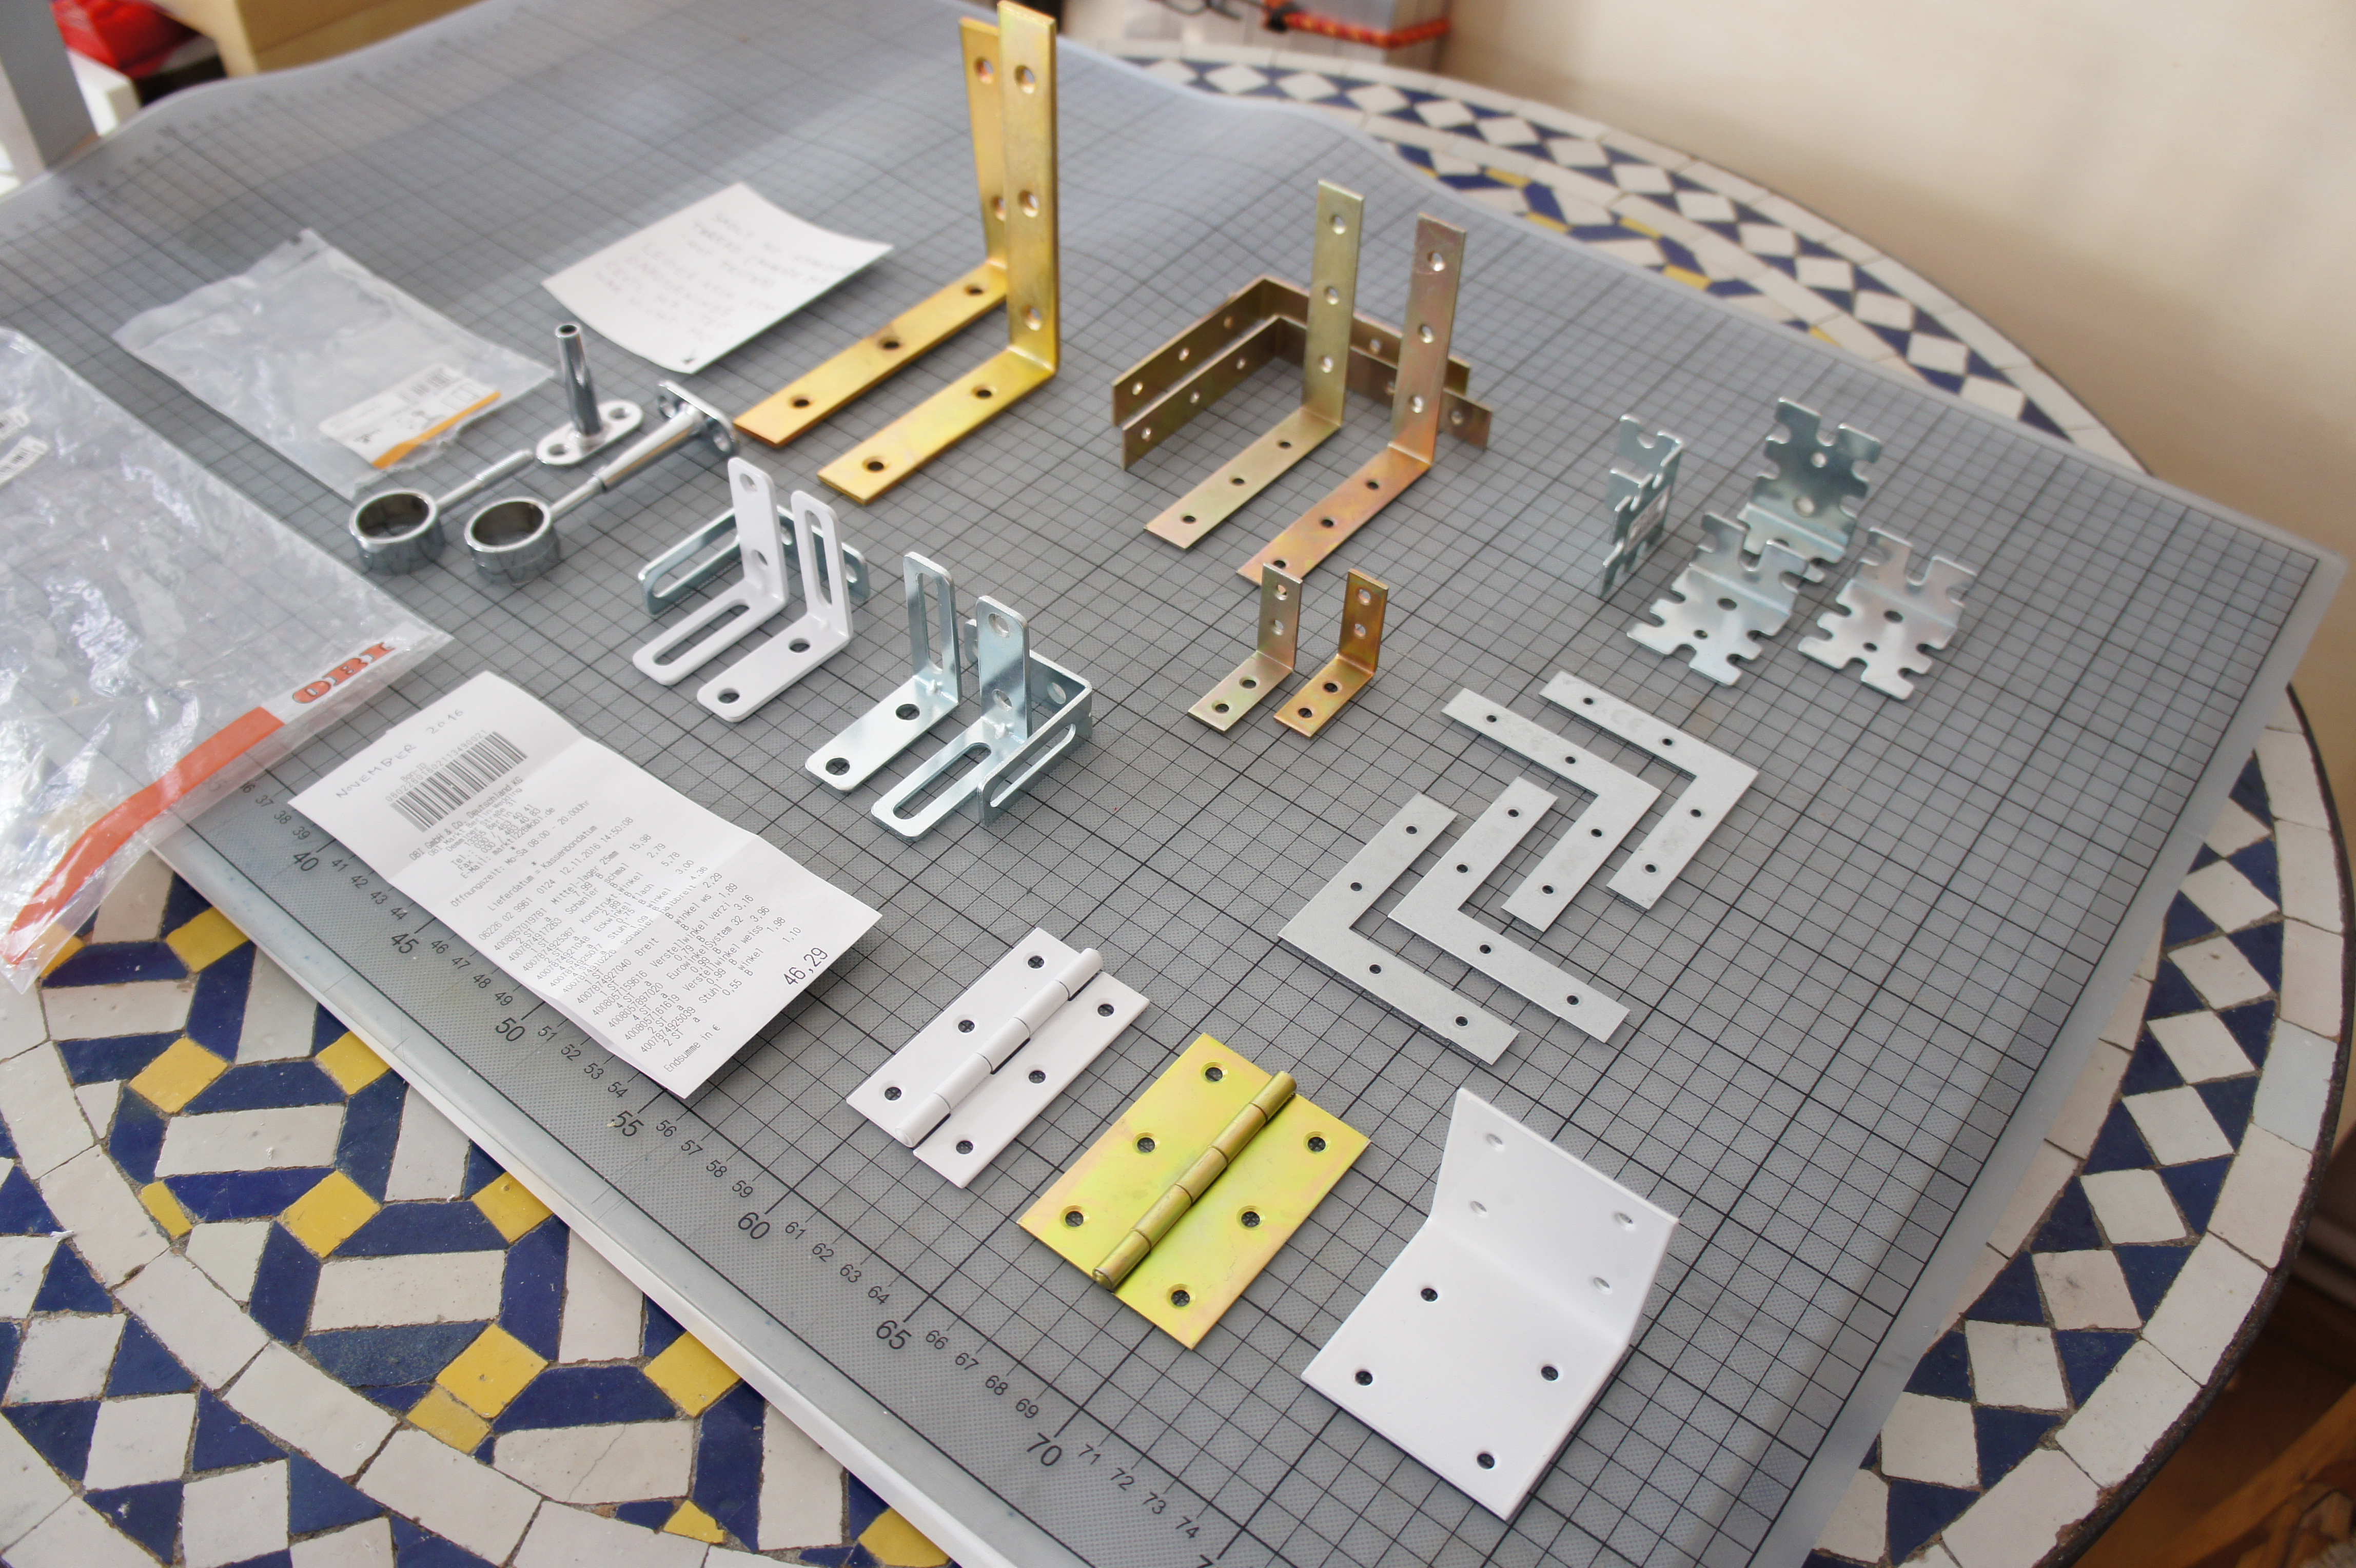
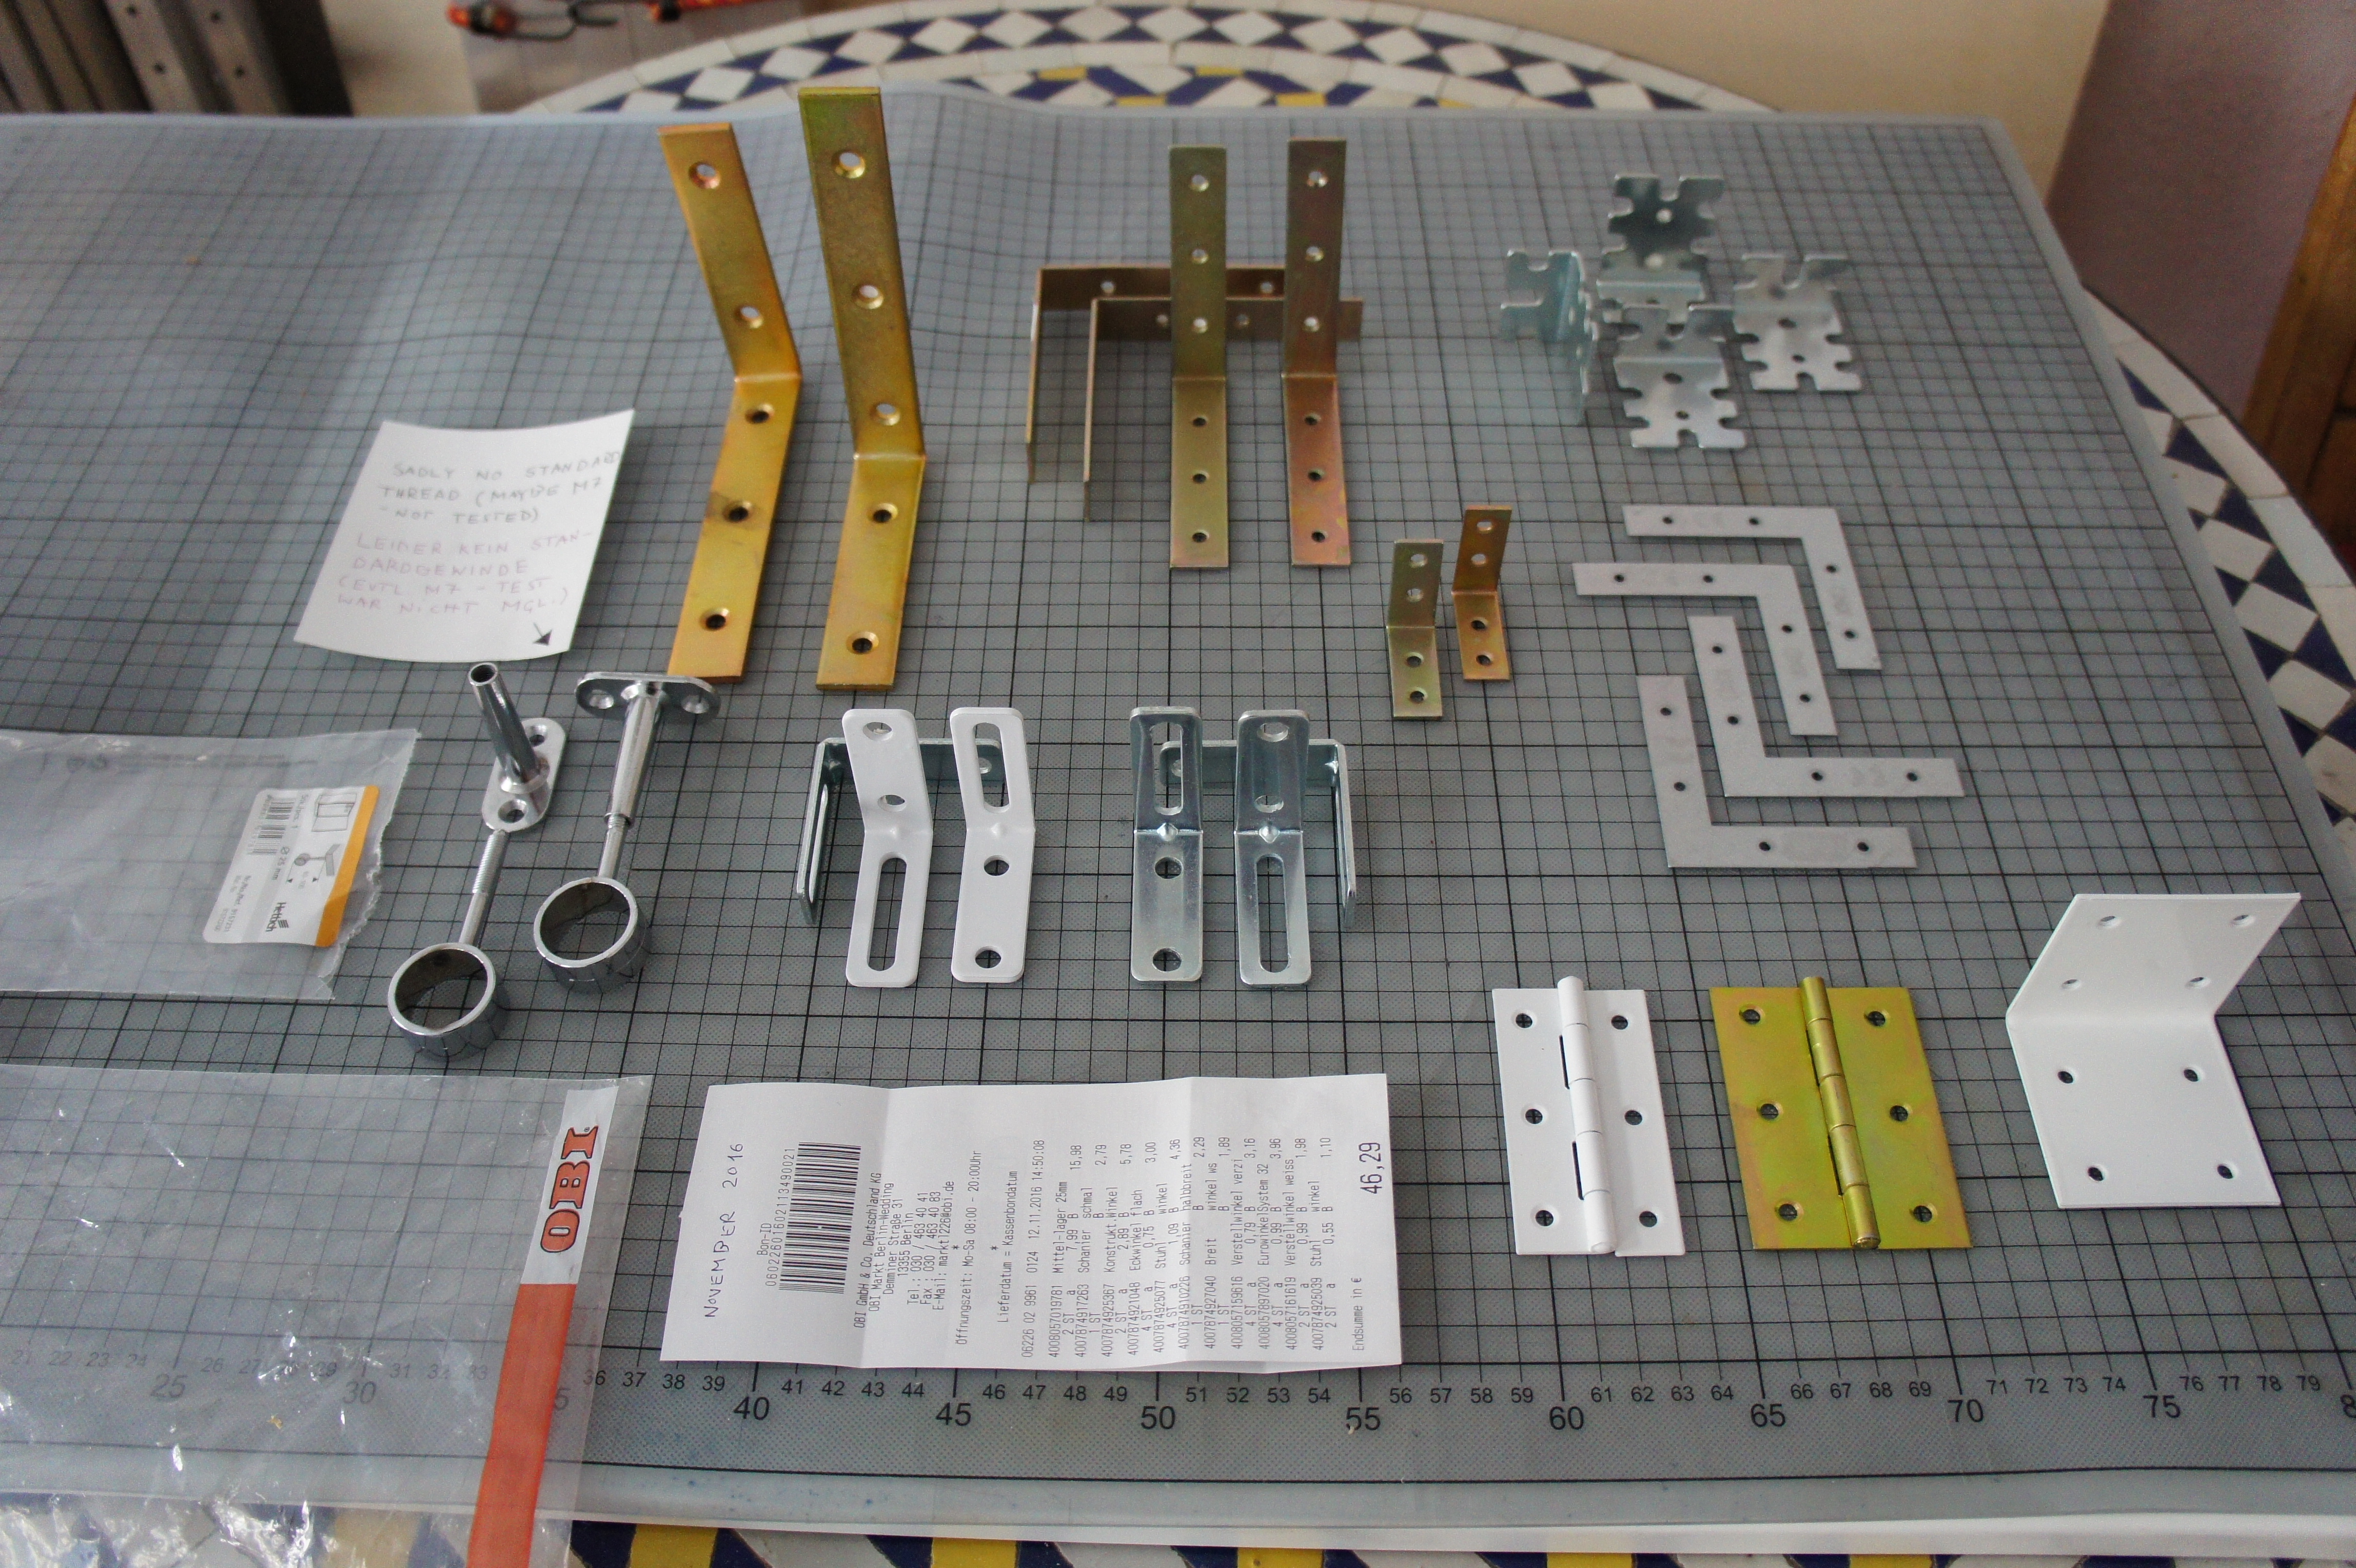
Metal Angles & Metal Parts bought at OBI (Click on Image to enlarge it and read the receipt | Related Blogpost here) / Winkel & Metallteile bei OBI! (aufs Bild klicken zum Vergrößern und Kassenbon studieren | Blogpost dazu)

Are you a Shop that want to offer the parts? Let us know.
°
°
Stencil / Schablone
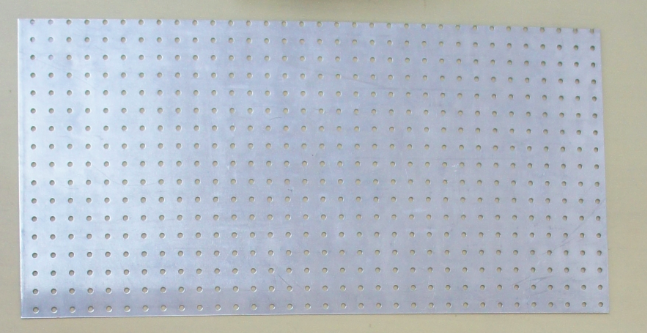
It is of course a good idea to work with a stencil. You can make it yourself. Or if you are in Germany – in every Baushaus you can buy a perforated plate with 1,5cm x 1,5cm – in Berlin you can go to Modulor – they have also the same perforated plate with the 3erlin Grid measures! You can order it also online.
Es ist natürlich eine gute Idee, mit einer Schablone zu arbeiten. Die kann man selbst herstellen oder zumindest in Deutschland bekommt man in jedem Bauhaus Makrt ein 1,5cm x 1,5cm Lochblech, und wer in Berlin ist – bei Modulor gibt es dasselbe Lochblech wie bei Bauhaus. Kann man auch online bestellen.
Does not fit? / Passt nicht?
If you work with your hands you can’t reach the same level of accuracy as a machine. Sometimes the holes will not fit onto each other. The simple trick is then to make them one size larger – till the parts finally fit. We start usually with size 5 and work our way up if necessary.
Wenn man mit den Händen arbeitet, ist man kaum so genau wie eine Maschine. Manchmal passen die Löcher dann nicht aufeinander. Dann kann man sie einfach eine Nummer größer machen – ausweiten – bis alles zusammen passt. Wir fangen in der Regel mit 5er Löchern an und werden langsam größer, wenn nötig.
Spacer / Abstandhalter
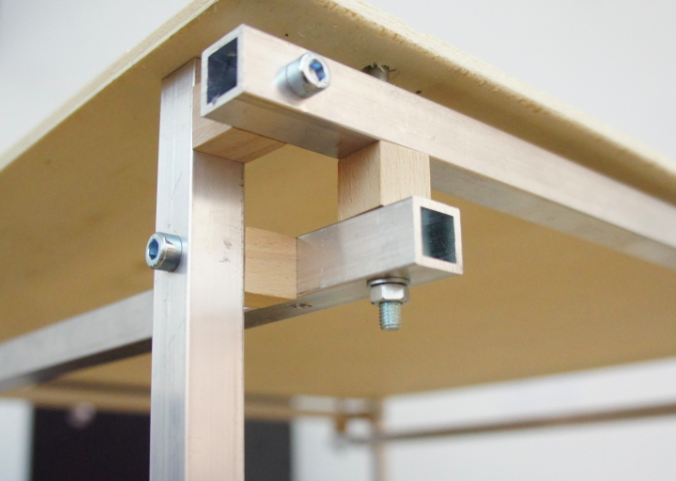
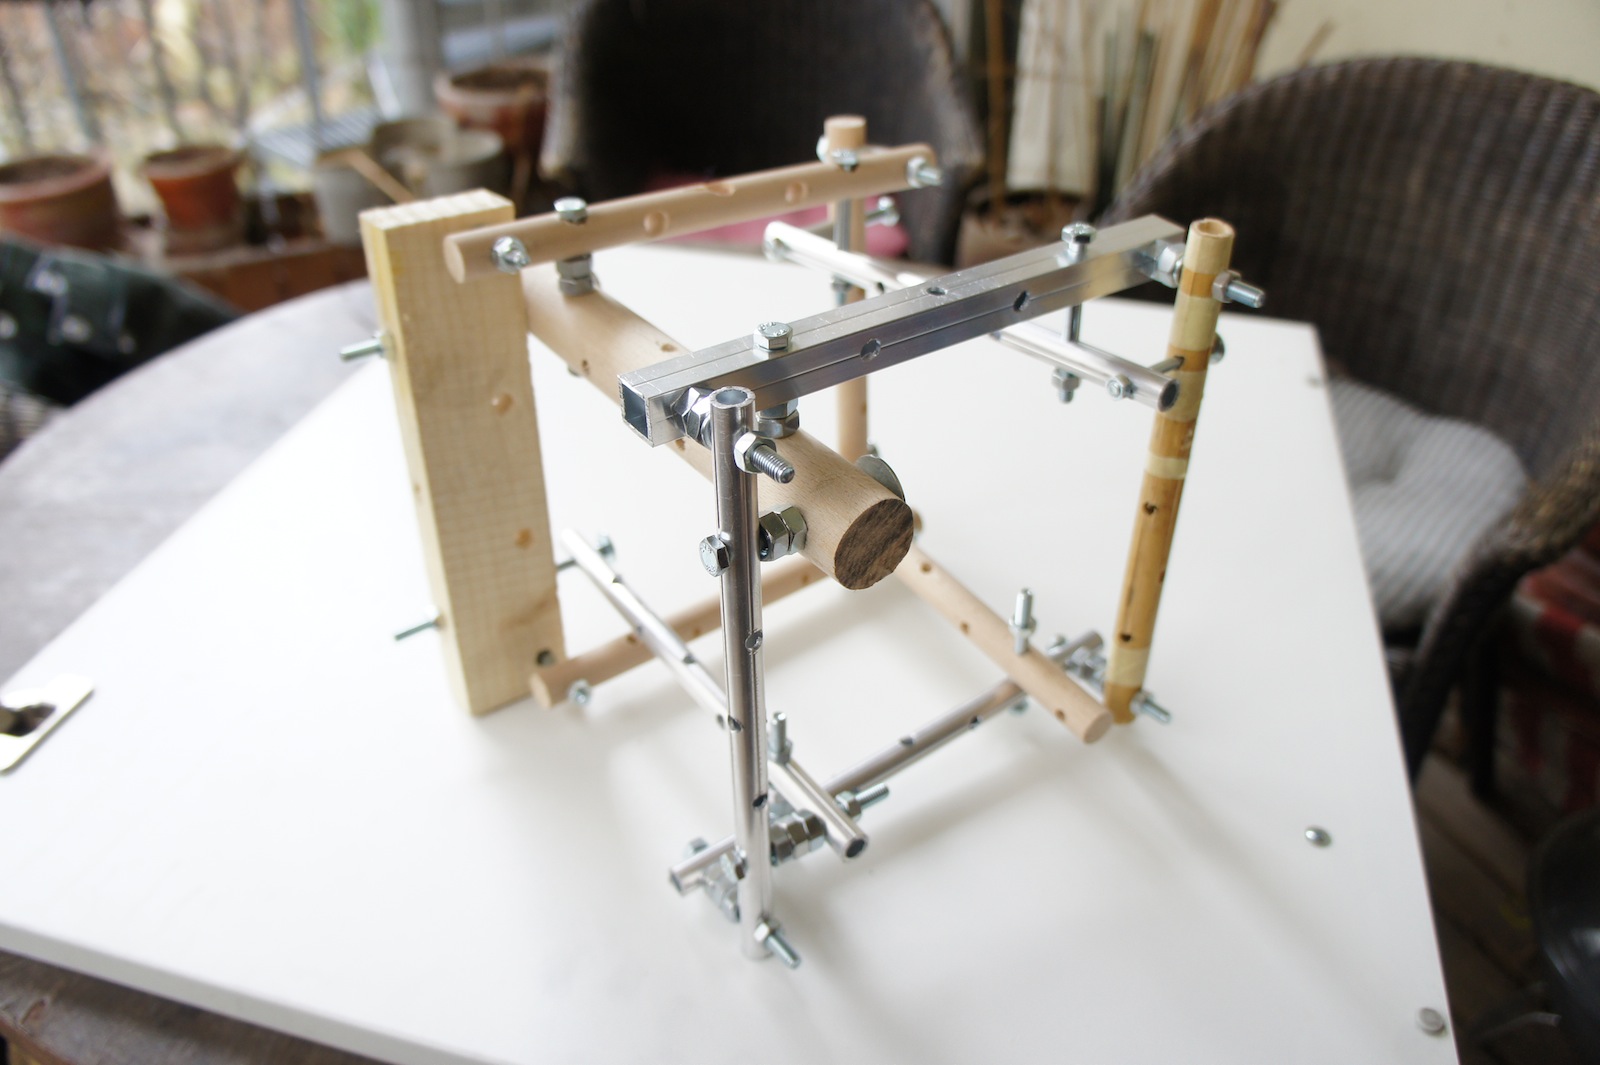
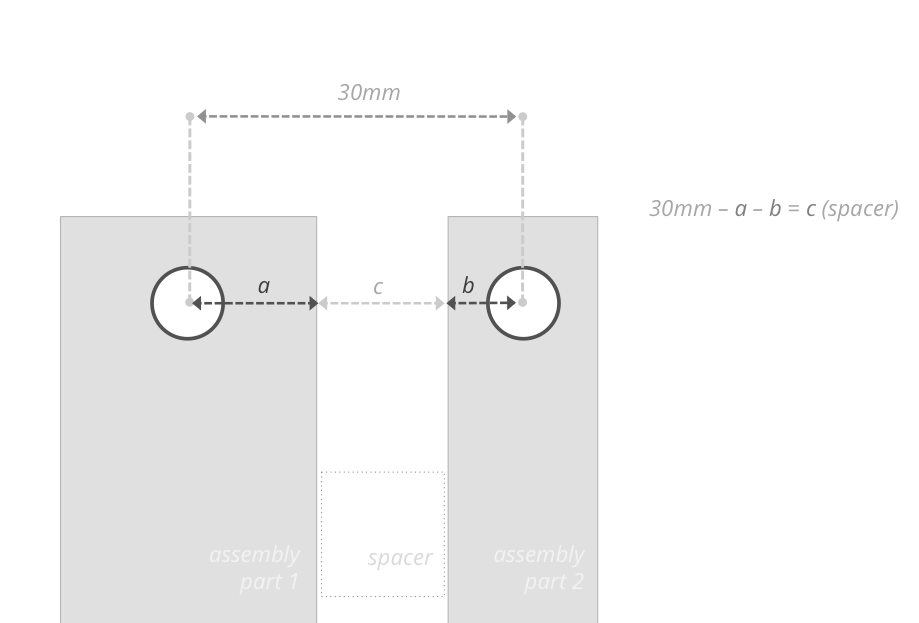
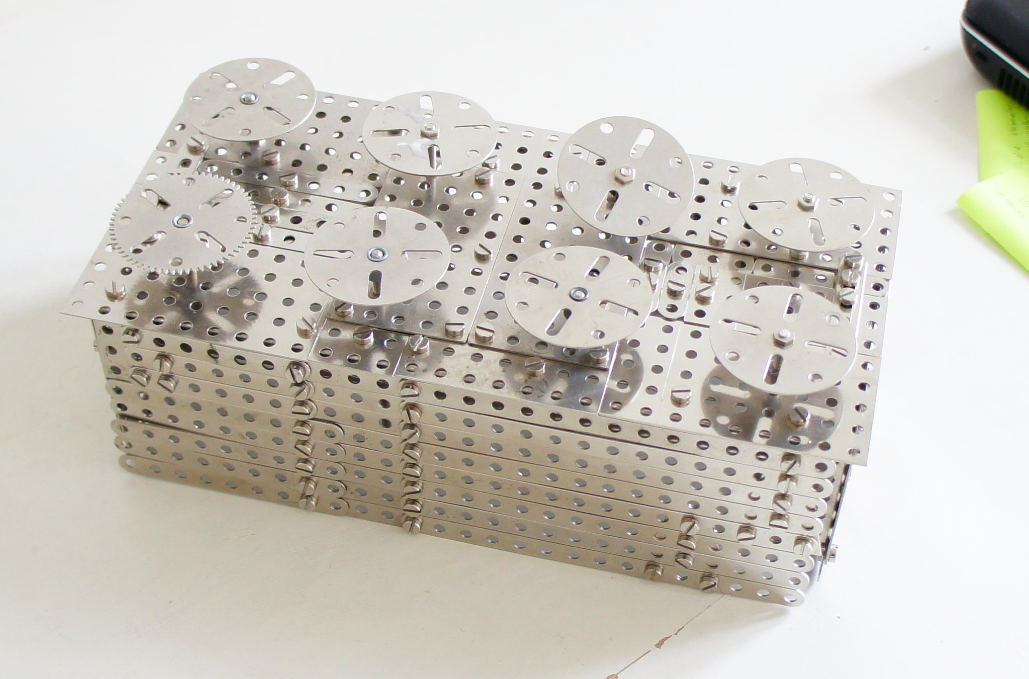
If you work with the Grid in general and also if you combine it with found material you will quickly find yourself in the need for spacers. In the picture below you see an XYZ connection made with 15mm poles. If you place the holes in the middle of the poles there will be always 15mm missing between the poles in that connection. For this you will need spacers.
Arbeitet man mit dem Grid und kombiniert es außerdem noch mit gefundenen Materialien, wird man schnell feststellen, dass man Abstandhalter braucht hier und da. Auf dem Bild sieht man eine XZY-Verbindung mit 15mm Aluminiumstangen. Setzt man die Löcher in die Mitte der Alustangen, fehlen bei der XYZ Verbindung 15mm dazwischen. Die kann man auffüllen mit Abstandhaltern.
You will figure out quickly that you need different sizes of spacers depending on the space you have to fill. We at Mifactori have always a number of different sizes in our workshop.
Man wird schnell merken, dass man verschiedene Größen von Abstandhaltern braucht, je nachdem, wie groß der zu füllende Raum ist. Bei Mifactori haben wir immer eine Auswahl verschiedener Größen bereit liegen.
Get Spacers / Abstandshalter besorgen
Sources
- We have used so far wooden balls you can buy in different sizes and already with a hole in the center in different DIY and Tinker Stores – for example at Modulor in Berlin.
- You can buy all kinds of spacers in different sizes and different materials from various sources in the web. After a while of searching we finally found this source for 15mm spacers made from Aluminum.
- At DIY and Tinker stores you can also buy wooden cubes in different sizes. Unfortunately they don’t have a hole. See next step.
Quellen zum Kaufen
- Wir haben bisher verschiedene Holzkugeln genutzt, die man schon vorgelocht und in verschiedenen Größen in Bastelläden bekommt, z.B. bei Modulor in Berlin.
- Unter dem Stichwort “Distanzhülse” kann man Abstandhalter in verschiedenen Größen und aus verschiedensten Materialien überall im Web kaufen. Nach einer längeren Suche haben wir auch 15mm Aluminiumhülsen gefunden.
- In Bastelläden bekommt man auch kleine Holzwürfel in verschiedenen Formen, die aber leider ungelocht sind. Dazu im nächsten Schritt.
Making Spacers Yourself / Abstandhalter herstellen
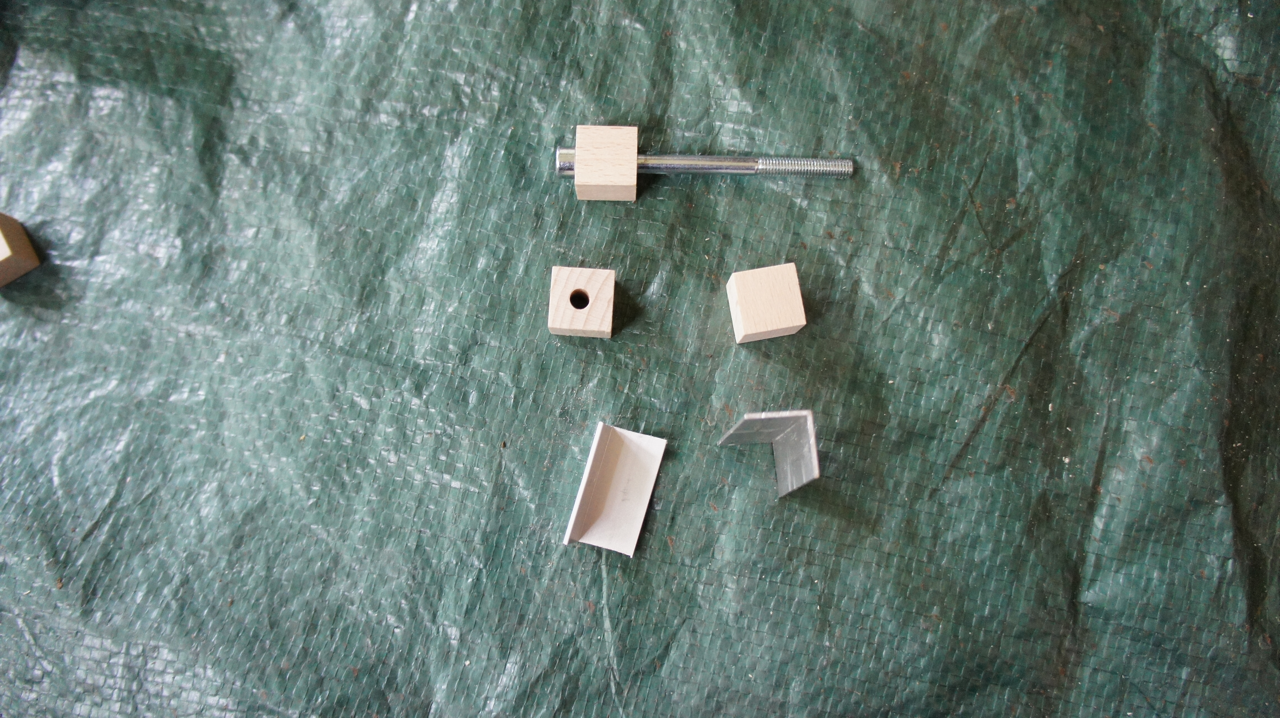
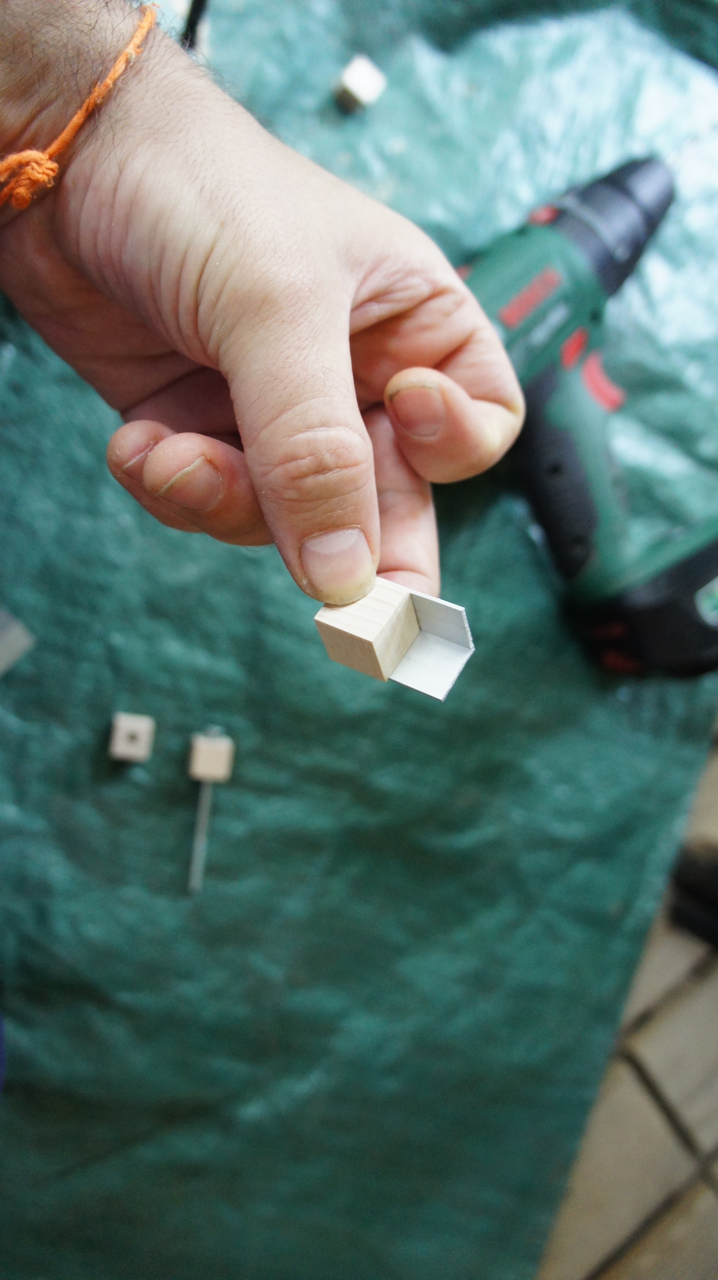
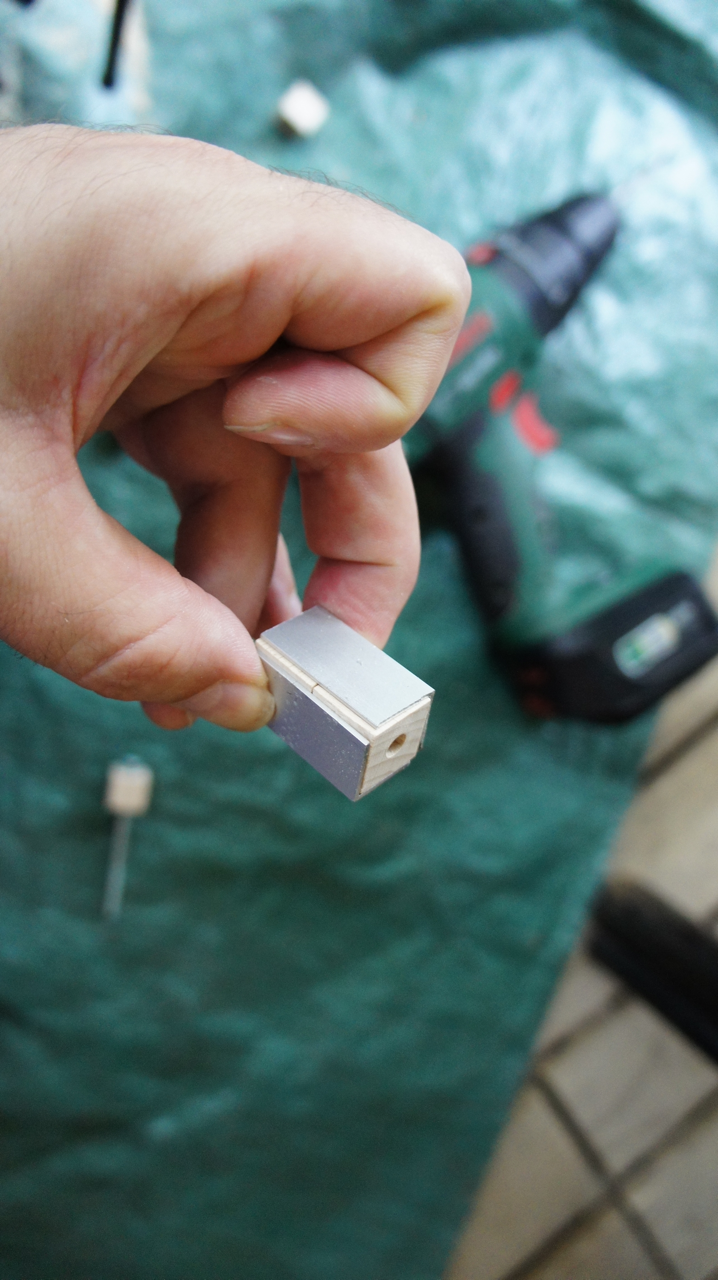
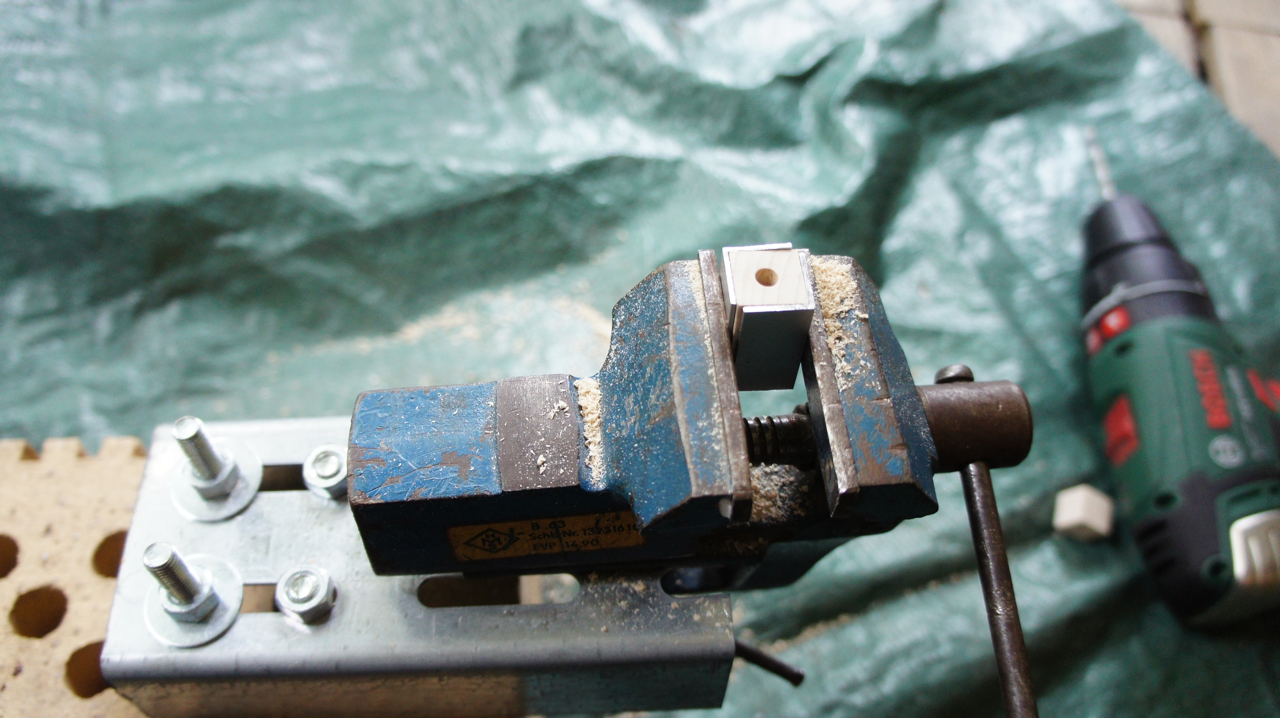
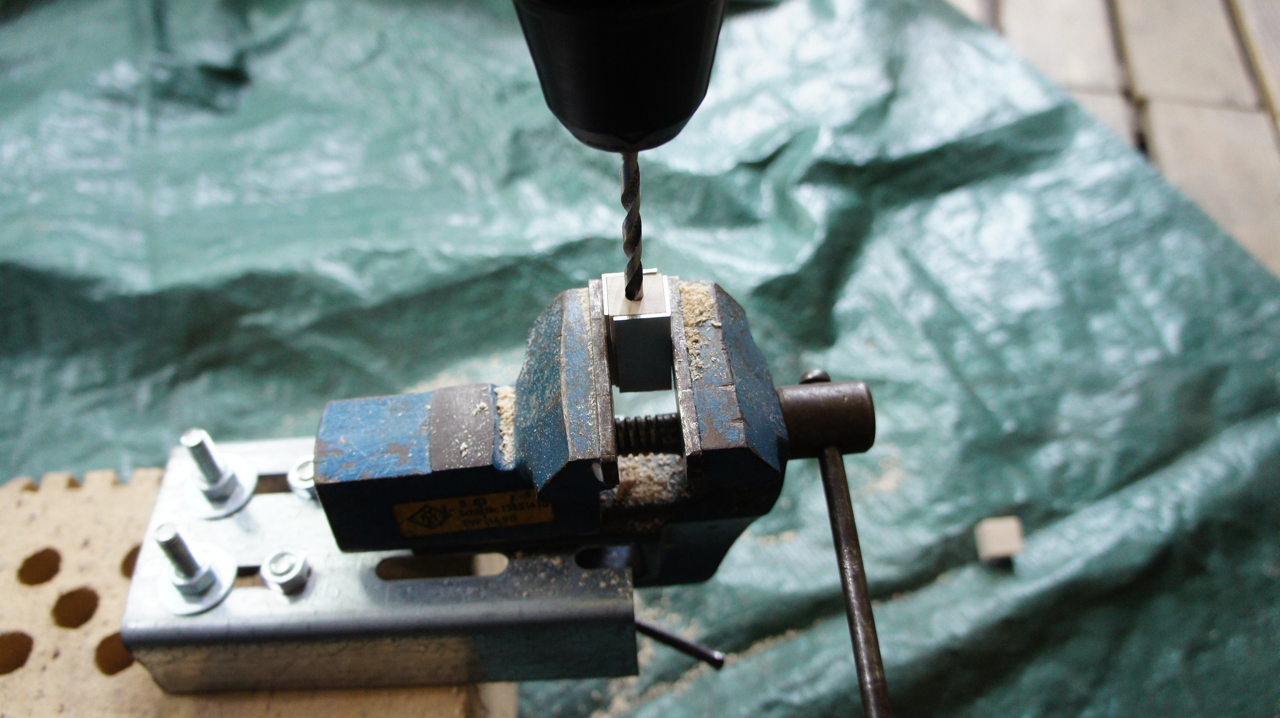
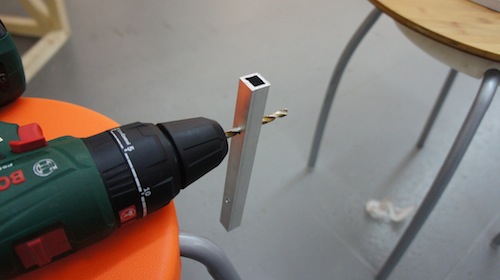
Here is a technique you can use to place holes into the center of a wooden cube. You first need to create one cube – with luck – to use as a mold afterwards. Hit [STRG] or [CMD] and click on the images to enlarge them and follow the steps.
Hier ist die Technik, die wir nutzen, um zentrierte Löcher in hölzerne Würfel zu bohren. Als erstes muss man mit freier Hand – und mit Glück – einen guten Würfel herstellen, und diesen dann als Schablone verwenden. [STRG] oder [CMD] gedrückt halten und auf die Bilder klicken zum Vergrößern und dem Nachverfolgen der Schritte.
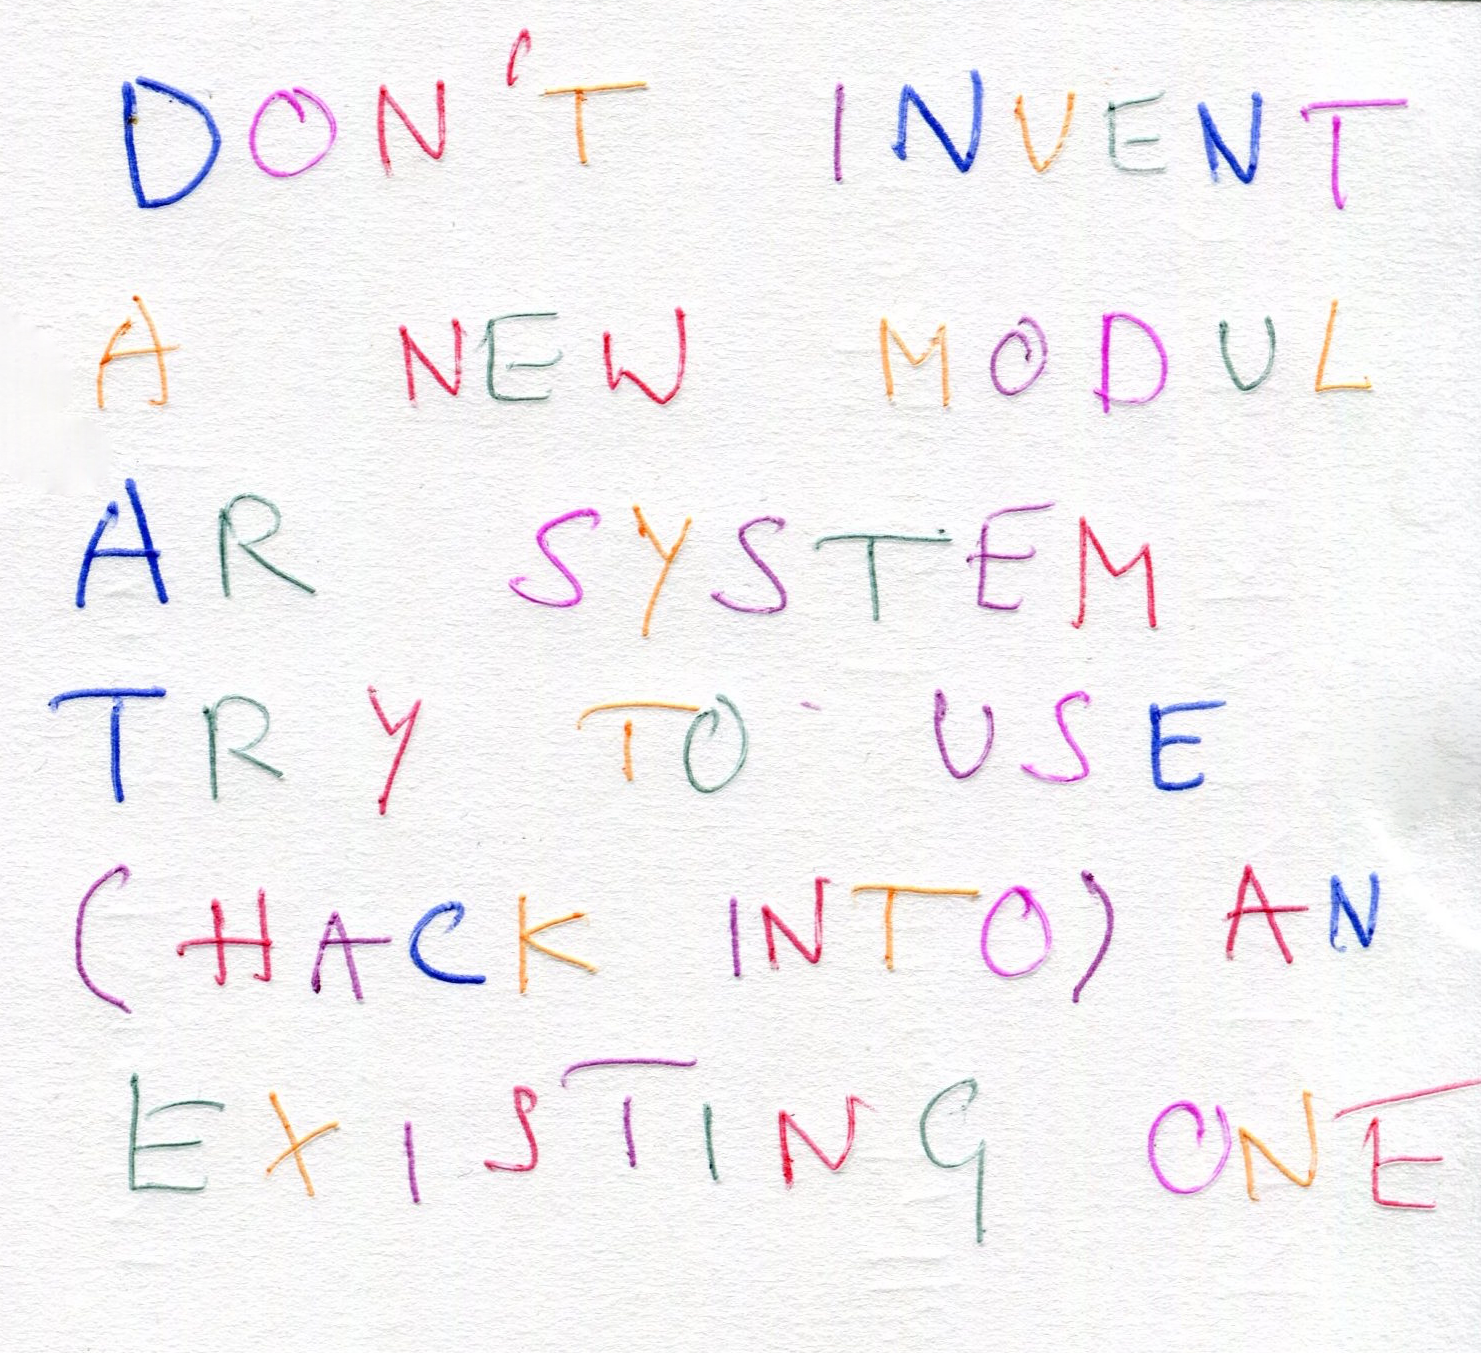
Don’t Invent A New Modular System – Try To Use (Hack-Into) an Existing One – Combine Modularity! / Andere Systeme kombinieren
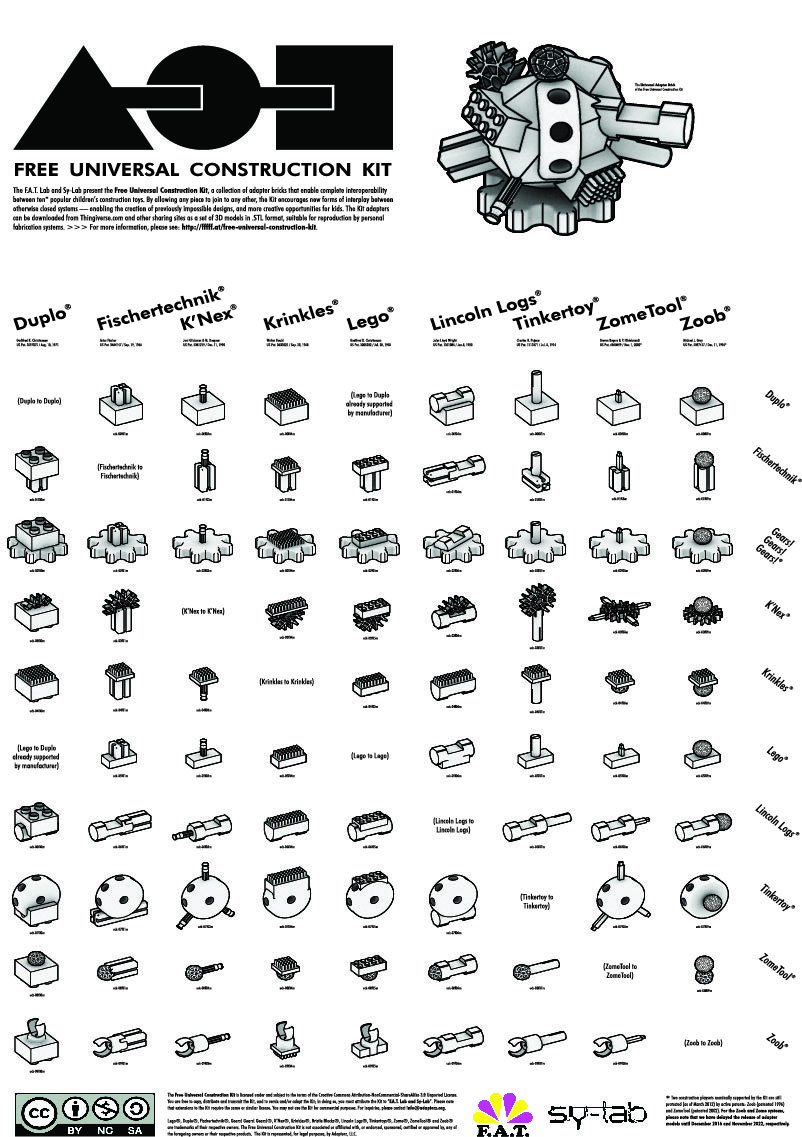
The 3erlin Grid is derived from a toy and connects to other parts that are already out there. Another thing you can try to do is to combine the grid with other modular systems by creating connectors to it or by gearing different systems into each other (click the images above for both). You can find a lot of examples for modular systems:
Check Our Open Collection On Modularity
Erfinde kein neues modaleres System, versuche ein existierendes zu nutzen (oder zu hacken): Das 3erlin Grid ist abgeleitet von einem Spielzeug und lässt sich mit einigen weiteren fertig kaufbaren Teilen verbinden. Eine weitere Sache, die man damit versuchen kann, ist es mit anderen modularen Systemen zu verbinden, z.B. indem an Verbindungsstücke zwischen den Systemen konstruiert oder verschiedene Systeme ineinanderstellt/-stapelt. Wo findet man Beispiele für andere modulier Systeme?
Check unsere offene Sammlung zu Modularität.
Why do we document? / Warum dokumentieren wir?
As Mifactori is amongst the first using the 3erlin Grid we undertake it to create an extended DIY focussed documentation of it – collect and provide basic instructions. If you have anything to add or if you have created an own tutorial please let us know – in the comments or write us an email to mifactori@email.de
See all Mifactori 3erlin Grid Examples and Posts.
Da Mifactori unter den ersten ist, die das 3erlin Grid verwenden, unternehmen wir es, eine möglichst vollständige DIY orientierte Dokumentation davon zur Verfügung zu stellen – wir sammeln und posten Basisinstruktionen. Wenn Du etwas hinzuzufügen weißt, oder eine eigene Dokumentation erstellt hast, lass es uns wissen unten in den Kommentaren oder per Email: mifactori@email.de
Alle Mifactori 3erlin Grid Posts und Beispiele
More will follow / Mehr gibt es bald
20 Comments